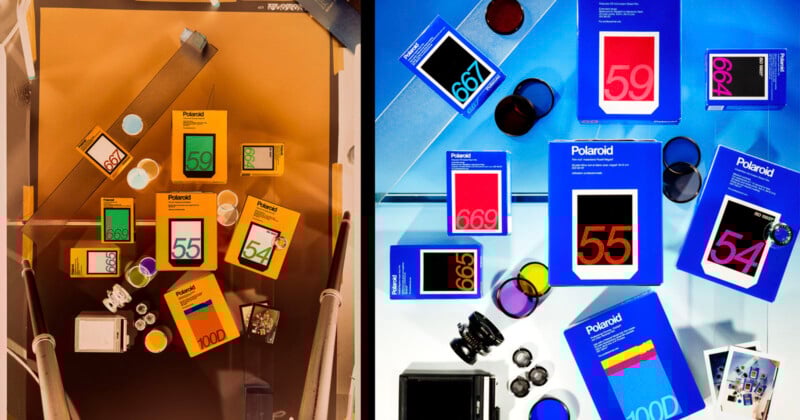
Once upon a time, in the last century, before hipsters and when only restaurants had menus, photography was film and film was photography. Both consumers and pros used film, and every camera jockey had a favorite kind: large format, medium format, 35mm, APS, 126, Disc, etc.
Each film size had a purpose and a corresponding smorgasbord of flavors and speeds from slow color negative, to high-speed infrared, to black and white transparencies. Some ‘serious amateurs’ shot Kodachrome slides and then gathered their unlucky relatives around slide projectors in dark rooms, but most everyday picture-takers spent the 20th century shooting negative film – what we called “print film” – and they dropped off their rolls at the local camera shop or Fotomat kiosks to get prints a week later. Then the quick-print machines proliferated, and folks could get their ‘doubleprints’ same-day at drug stores and 1-hour-photo labs.
In professional photo studios, the smoldering, 3200 Kelvin tungsten hot lights of the first half of the 20th century were losing popularity because strobe systems had become more powerful, affordable, and reliable in the 1970s. The use of tungsten (3200K) films began to taper off. In the 1990s, newly minted photo studios in the U.S. like mine usually bought daylight-balanced (5500K) strobes – packs or monolights – made by companies like Speedotron, Norman, Balcar, Dynalite, Profoto, Buff, and Elinchrom, to name a few. Every studio had their own tricks, techniques, and exposure mojo depending on what kind of photos they made to get paid. Whether it was kindergarten portraits on long rolls, or 4×5 transparencies for Architectural Digest, or glass-mounted slides for multi-image presentations projected by a dozen synchronized slide projectors, or 8×10 transparencies for Playboy magazine centerfolds, or massive wedding portraits above the fireplace, or black and white glossies for actor’s headshots, or senior pictures with big hair (mall-bangs and mullets), every pro tog had a system, and we all used film.
Wee Weddings in the 1980s
My first photo gig began in high school, around 1986, shooting frenetic mini weddings on the weekends. The Cameo Wedding Chapel was bizarre; the owner had invented “picture-packages” that couples could buy as add-ons to their hour-long mini weddings (think Vegas without Elvis). We used two 1960s Rolleiflex 2.8 Planar twin-lens cameras with Metz 60 CT-1 ‘potato masher’ flashes. Every package exploited the same poses (in the same spots) with memorized exposure settings. Bride + Groom + wedding party + group formals + ring exchange + kiss + a few ‘romantics’ with bride and groom looking lustfully at each other. Every room had white ceilings for bounce-flashing, and prescribed camera settings that would result in satisfactory negatives (if I remembered to adjust the camera as I went room to room). Picture packages were delivered two weeks later with four, eight, or twelve textured 5×5 inch prints in a Naugahyde folio. We did half a dozen weddings every weekend, shooting one or two rolls (12 or 24 square frames) per wedding depending on the package. Most marriages lasted until they picked up the folio, some did not, but the packages were prepaid either way.
Kodak Vericolor VPS III (160 ASA, C-41 process) was the industry standard wedding film in the late 1980s, with soft contrast, portrait-friendly tonality, and the capacity to make acceptable prints from underexposure and hella overexposure. Most of my muffed exposures could be un-muffed when the photo lab made the 5×5 inch textured color prints. We couldn’t change Vericolor’s color balance, (VPS III was daylight balanced) but if exposed under artificial lighting much of the orange or green could usually be “dialed out” when printed, leaving no real need for filters. Kodak and Fuji high-speed 400 ASA medium format 120 neg films came out in the 1990s… So fast! Mind blown!
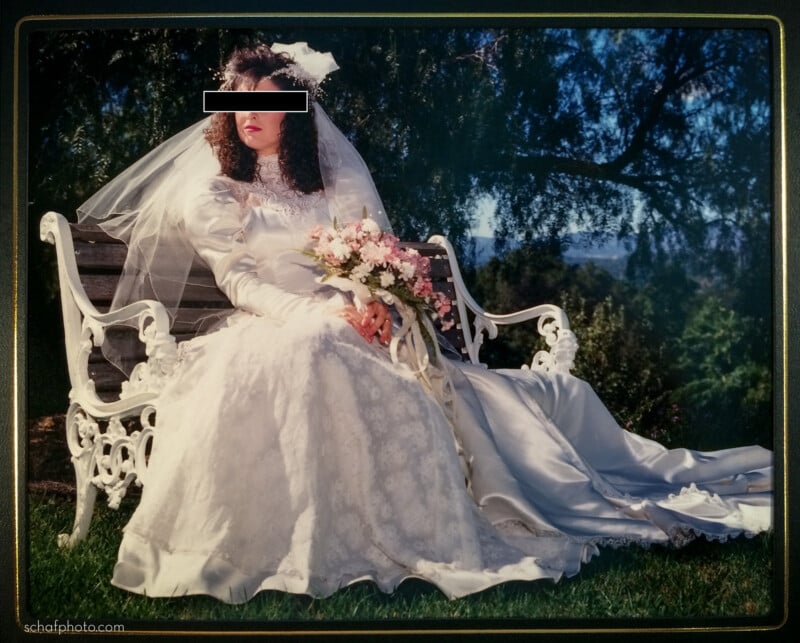
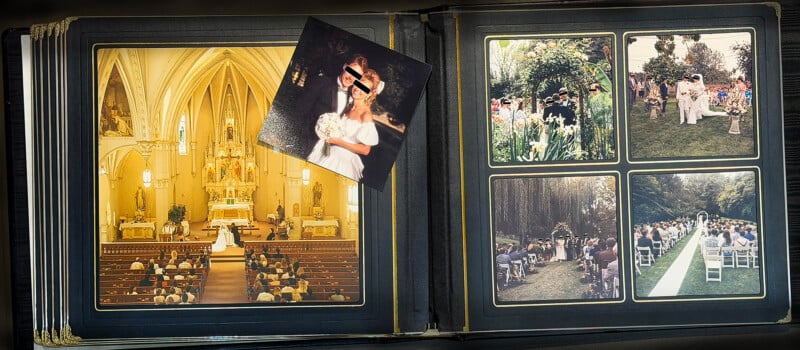 My wedding portfolio around 1992, full of textured 5×5 and 10×10 prints.
I soon bought my own used Rollei and started booking wedding gigs in unfamiliar churches. I had to figure out how to meter outside, and use flash when the ceilings weren’t white, but VPS III negatives were so forgiving that my mistakes were manageable. Unlike shoot-now-sort-later wedding togs, I would carefully expose around two hundred frames over the course of a day-long wedding and reception. Weeks later, I would deliver around 150 prints inserted into a snazzy Naugahyde album – about a 75% hit rate. It was great money for a Saturday afternoon, but over the years I decided I hated people, so I eventually phased out of wedding photography just as photojournalistic, candid-style 35mm wedding photographers came into vogue. The candid 35mm photogs shot more 100, 400, and 800 ASA rolls, and tossed out more rejects in their edits, but we all shot film, and we didn’t see results until days (or weeks) later when the prints came back from the lab.
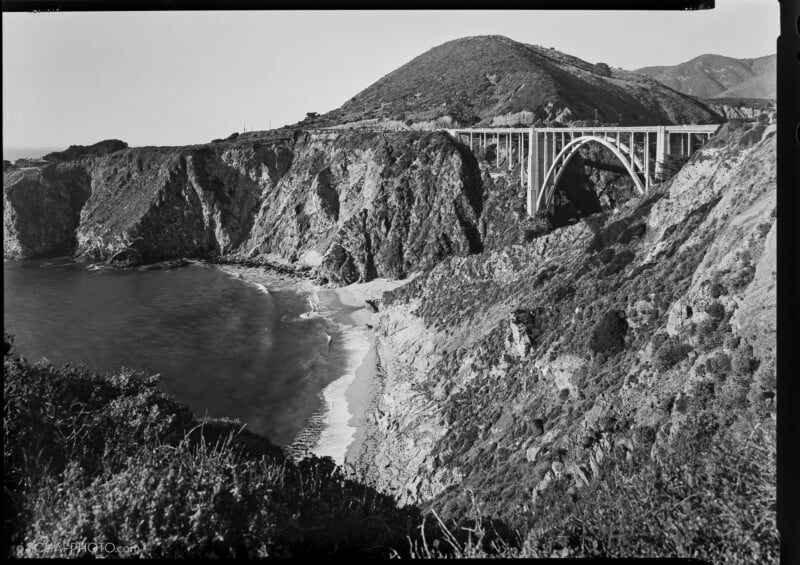 5×7 negative of Bixby Bridge near Big Sur on Ilford HP5 film.
Ansel as Idol
After high school, I was dogged in my pursuit of photography. Living at home, with a darkroom in the garage, and my trusty Pentax ME-Super, I was a wannabe Ansel Adams. I named my cat Fuji. I got a summer job selling Sure Shots, One Touches, and Kodacolor film at Dexter’s Camera and HiFi — where Norman, my boss, would always remind me to push the “strapfiltercase.” I bought and tested every film Dexter’s sold from Agfa Scala to Kodak Technical Pan (I rarely took home a paycheck). I experimented with darkroom papers from Cibachrome to Ektalure G. I put the “error” in “trial-and-error.”
My pipe dream was like most wide-eyed photo-nerds at the time: travel the world with a shiny mahogany large format camera, shooting amazeballs pictures of waterfalls at f-64, making artsy black and white silver prints to exhibit on the walls of swanky galleries. I was hankerin’ for an accordion on three legs, and Brooks Institute of Photography in Santa Barbara was just the place to learn how to play one. Entry-level photography classes at Brooks were all taught on large format 4×5 cameras using black and white Kodak Tri-X 400ASA film with hand-held incident light meters. At Brooks small formats were looked down upon as amateur and wedding photographers were considered scum. I kept my lucrative Saturday gig as scum a secret.
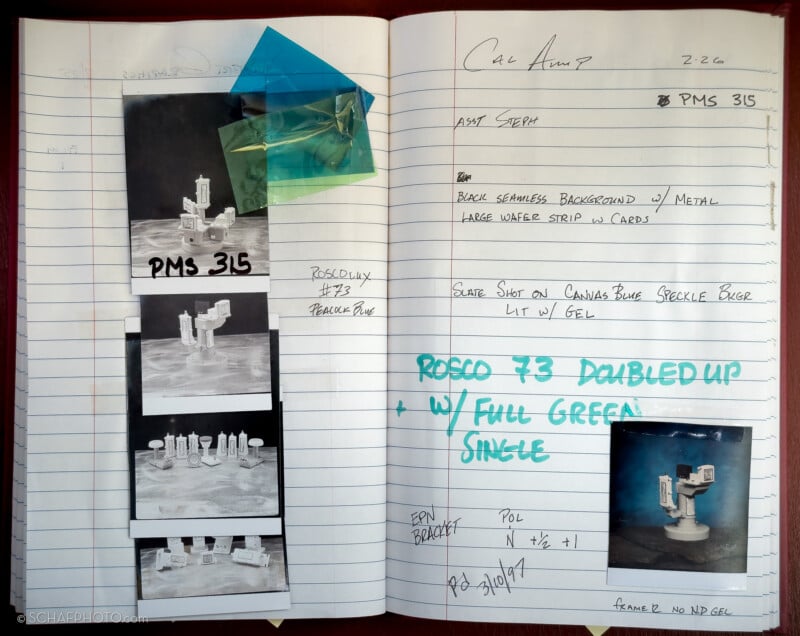
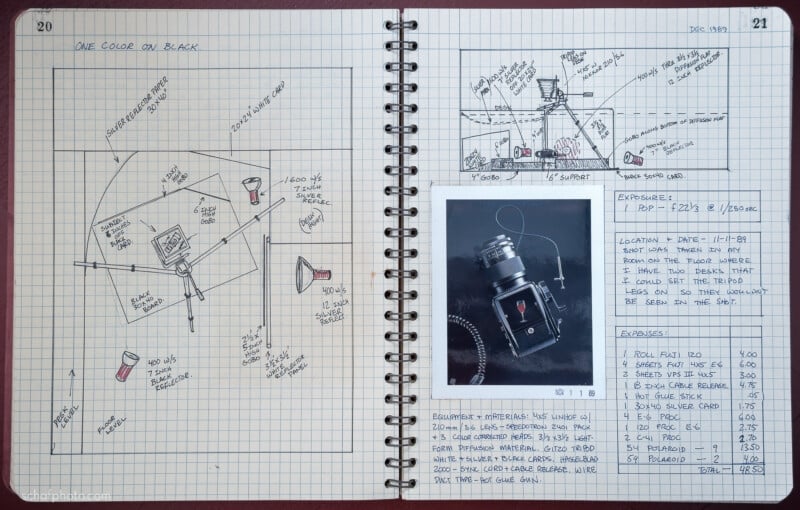 December 1989. One of my Brooks Institute of Photography comp books for the “One color on black” assignment.
The black and white prints of Ansel’s Group f/64 required a thorough understanding of his complex Zone System of exposure, development, and contrast prognostication. For each sheet of film, adjustments were calculated for bellows draw, filter factors, and long-exposure reciprocity. Ansel’s magic math leveraged careful metering and pre-visualization of contrast with post-exposure film development adjustments to compensate for flat or contrasty lighting. It was a foundational (complicated) way to learn theory – very slow and precise – and these exercises ended up teaching me how to ‘see’ light in preparation for my later work in the studio.
I finally settled on 35mm Kodak HIE Infrared as my artistic medium, but I never did succeed as Artsy Adams Jr. (But I could have been a hipster if they had been invented in the 1990s – I already had the 1978 VW campervan and flannel shirts.)
Ansel’s Zone System was perfect for contemplative art photos of Half Dome in Yosemite, but as I started to learn strobes, I had to accelerate my exposure math. If a studio job required black and white deliverables, I’d load the camera with forgiving Tri-X or Plus-X film, which would handle egregious over- or under-exposure. Most exposure miscalculations could be fixed in my darkroom when making the 8×10 inch glossys on multigrade paper by wiggling homemade lollipops to dodge and burn. The prints would be duplicated in newspapers and all my subtle artsy tones would be reduced to a barely recognizable halftone screen of contrasty dot-gain, but there was no social media to complain on yet.
 Tony’s Pizzaria, Kodak High Speed Infrared. A Mamiya-7 panorama 1999
The Little Studio That Could
At 20, with no clients and two years of experience at Brooks, I rented a small photo studio (room) on the second floor of an old packing house with no elevator for $500 a month. I got black-out shades for the windows and painted the walls and ceiling black. With a couple shiny new credit cards in hand, I put an ad in the Yellow Pages (ask your parents), bought a coffee maker, a beeper, a Speedotron Black-Line 2401B strobe pack, four fan-cooled strobe heads, a couple of soft boxes, snoots, grids, C-stands, and enough colored gels to make a disco jealous. My studio camera was a 4×5 Linhof Technicardan S with three Nikkor lenses. I’m not saying my photos were great, but clients kept paying me to photograph their stuff in my little studio and on location where I would run long extension cords to power up the Speedotron.
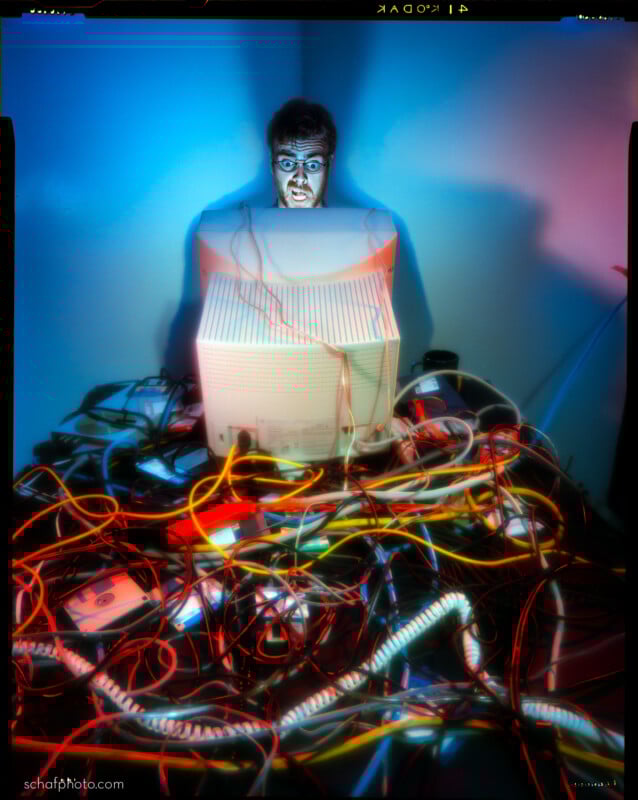
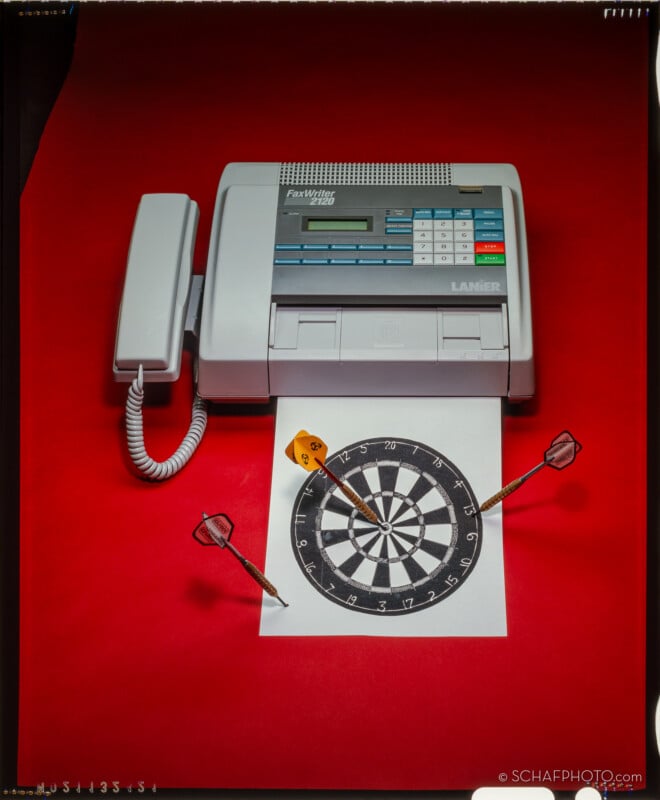
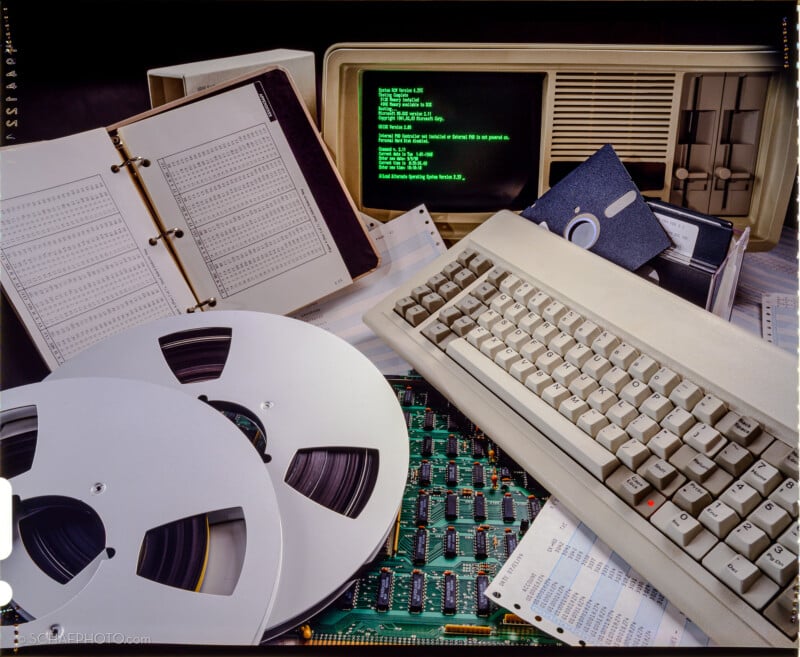 My first computer (plus some other random props to make it look “high tech”)
In the 1980s, America Online wasn’t online. Hashtags were just number signs. Email was years away. My state-of-the-art small business relied on a Rolodex, a fax machine, and an answering machine with tiny cassette tapes. Before the internet, commercial photography meant “for print.” Pictures were needed for magazines, books, direct mailers, catalogs, calendars and brochures, lots of brochures. Most ink-on-paper pictures came from scanned transparencies (not negs or prints) and were composed of screens of cyan, magenta, yellow, and black ink (CMYK). PCs still had floppy drives, and Photoshop had just been invented, but most studios, including mine, were a few years away from having a computer powerful enough to make use of it.
Film processing laboratories (pro-labs) were ubiquitous in the 1990s; processing E-6, C-41, and black and white film, and doing custom darkroom printing of black and white glossies, contact sheets, color chromogenic and reversal prints. Hallas Photo Lab was just ten minutes away from my studio, and in its heyday processed transparencies (E-6) three times a day, and did pushes, pulls, and snip-tests for an upcharge. Standing at their counter, I could evaluate my film on their color-corrected lightbox, without waiting for prints or scans. Most of the labs around my area were color calibrated using Kodak Q-Lab E-6 chemicals to deliver consistent color, contrast and speed; roll-to-roll, month-to-month. Sometimes I’d linger in the lobby waiting for my film to finish processing and it would come out of the dryer still warm, like cookies. As a bonus, every other photographer in town would also stop at the lab and we’d all gossip while we were picking up our… film… which we will never again call the abbreviated nickname for transparencies we all used in the 90s.
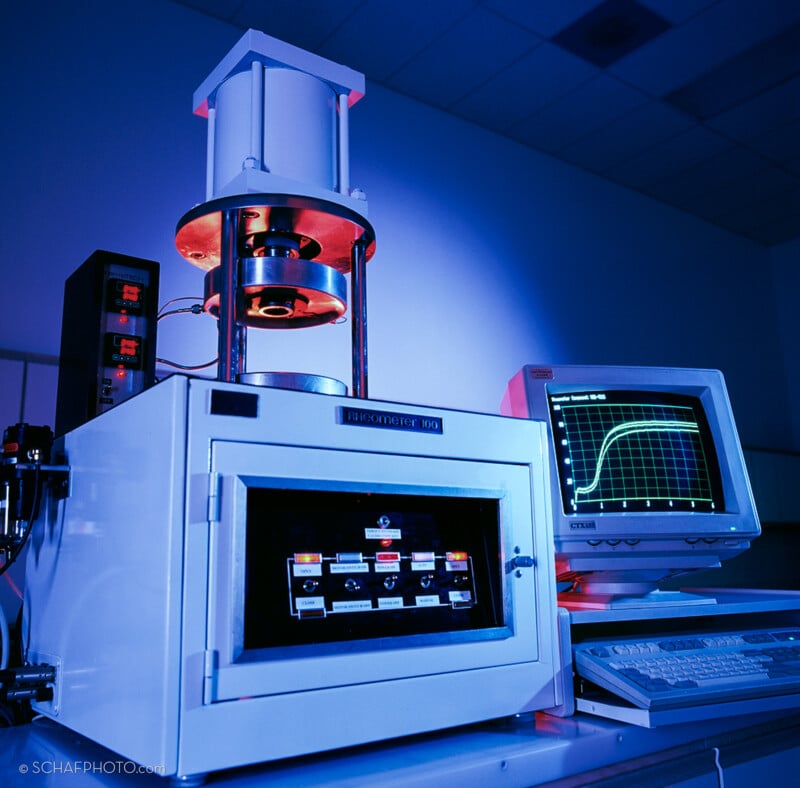
 1998 Studio log for Nusil Versasil-3 brochure photos.
Transparencies Were King
Color transparency films were the costliest to purchase, the most expensive to process, and the hardest to properly expose for a perfect representation of highlights and shadows. If transparency film was exposed a fraction of a stop from perfect, highlights or shadows were lost, and the film could be unacceptable for professional use. Half the time even perfect exposures looked too contrasty unless I added a bunch of fill-light to lower the transparency’s inherently high contrast.
Kodak, Fuji, Agfa and other manufacturers made 5500K daylight and 3200K tungsten film stocks with various color attributes. Color temperature, tint and saturation were baked into each film stock, it was my job to adjust the color of the light to match the film. Kodak Ektachrome Pro Neutral (EPN) was for color accuracy, Ektachome Pro Plus (EPP) and Fuji Provia Pro (RDP) were more saturated. If I wanted to turn the saturation up to 11 for bold reds and greens, I would use Fuji Velvia (RVP) – the vivid colors gobsmacked my clients on the light box but would never reproduce in CMYK print.
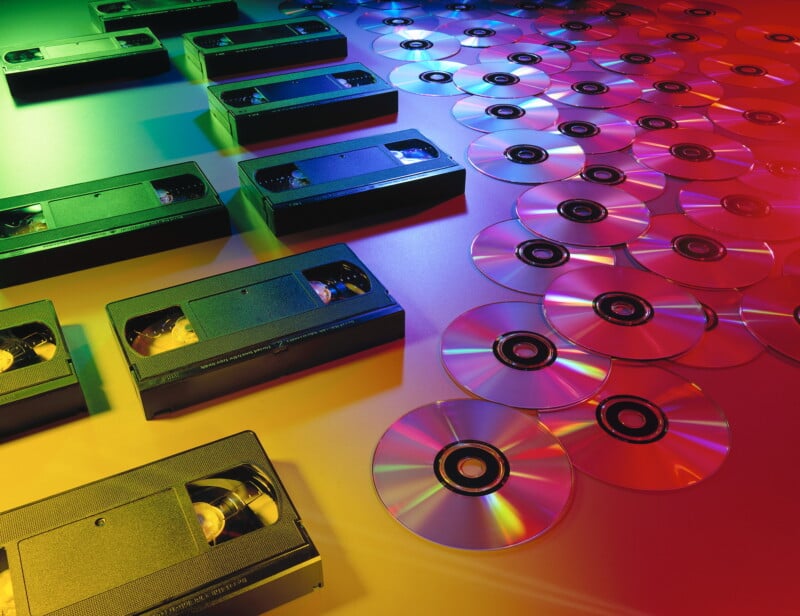
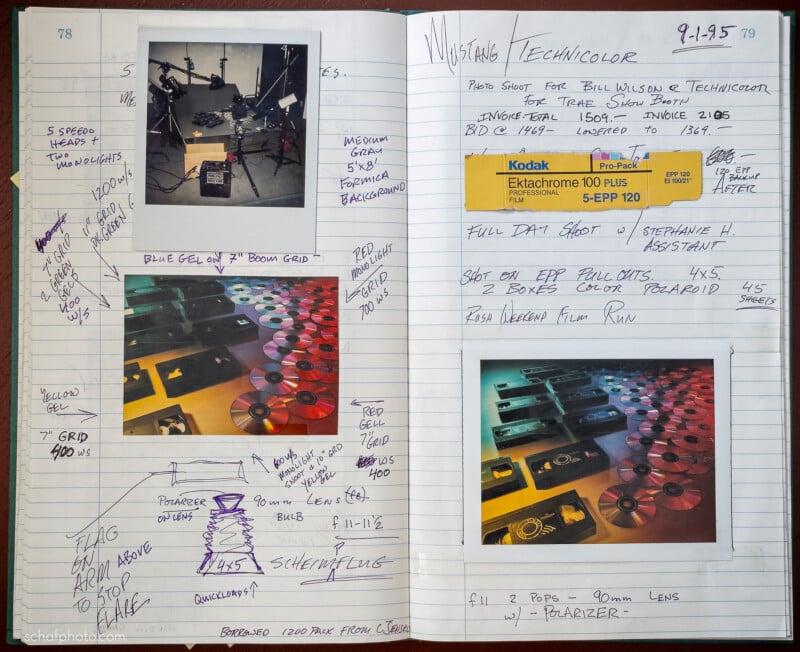 1995 studio log. VHS and DVD image for Technicolor trade show booth.
Today with digital sensors, unusual light sources often render neutral without a tint, and white balance can generally be left on AUTO (AWB) or be fixed later in post. But back in the day, mixed-lighting on transparency film was a fresh kind of hell — something I would spend hours correcting with filters and gels, because any unexpected lighting mismatch would create irreversible color crossovers. With practice, little gelatin, resin and glass filters, and big sheets of cinema gels, togs could fine-tune the color of the light reaching the film. I had Wratten CC (color correcting) gel filters of every intensity that I clipped to the front or taped on the rear of my lenses to nudge colors 5CC cooler or 10CC warmer to mitigate color casts. If my strobe-heads needed balancing, I’d cut a square off a 20×24 inch Roscolux gel sheet and carefully clip it on the strobe head so the modeling lights wouldn’t melt it. To correct a room lit by fluorescent tubes I’d usually add +30 magenta (called a “full minus-green” of course) filter to the lens. Transparency film came in only two flavors, daylight or tungsten, every tint, temperature, or cast that didn’t match was the photog’s responsibility to correct or remove (or justify to the client that “the background is supposed to be greenish-purple”.)

It may have been easier to visualize exposures back when continuous (hot) lights were the norm, because the (continuous) light your eyes saw, was the same light that exposed the film, but the models (and everything else) had to hold still and not melt. Not with strobes. It was not unusual for me to have a tabletop set where all four of my strobe heads were at different output levels with fill-cards and gobos adding and subtracting light. I had to consider bellows compensation, shifts, tilts, Scheimpflug, and gels and polarizing filters, all attenuating the exposure. I couldn’t visualize the split-second flash of my strobes which were twenty times brighter than the ambient room lights. My exposures were adjusted with lens aperture and strobe power-level, sometimes using multiple ‘pops’ over long exposures to increase depth of focus. Calculating precise exposures with the blinding pops of flash based only on modeling lights and multiple flash-meter readings broke my brain.
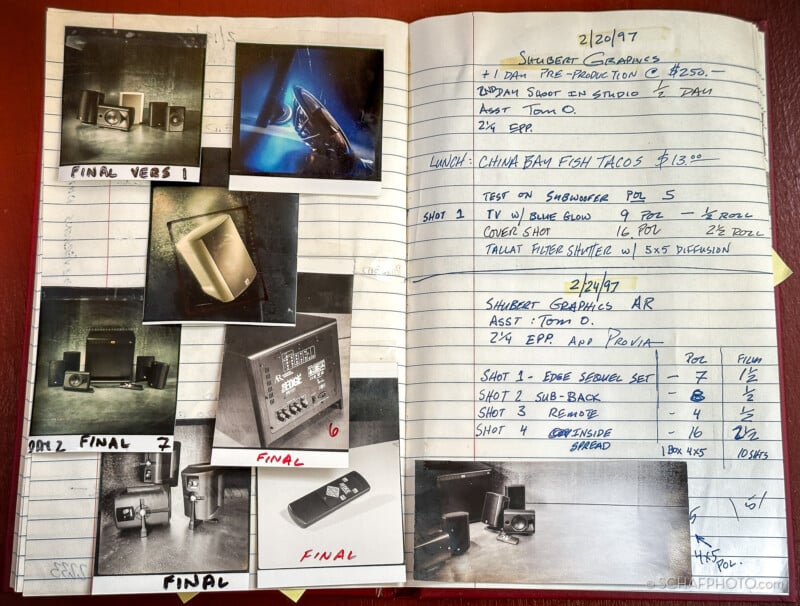 1997 studio log. Speakers for Illusion Audio brochures.
WYSIWYG ‘Roids
Weather they shot meatballs, waterfalls, or shopping malls; every pro tog had their own exposure mojo. The following was the witchcraft I adopted for shooting tabletop products. Since every product landing on my tabletop was unique (from circuit boards to surgical implants) and the light sources and colors all willy-nilly, I adopted a repeatable What-You-See-Is-What-You-Get (WYSIWYG) exposure system based on instant feedback and no math. At the time, peel-apart Polaroid was the cat’s pajamas – the only way to (almost) instantly get a representation of exposure and color through-the-lens before exposing the film.
I have a confession to make: I am a recovering “Polaroidaholic.” Like many 90s photogs, I quickly became addicted to ‘Roids. My clients also became accustomed to viewing the ‘Roids on the set so they could sign off on the photo (literally sign the ‘Roid with a Sharpie). Depth of focus, cropping, color balance and exposure could be checked before the film holder was loaded into the camera and the final (expensive) film was exposed. Each ‘Roid would take between 20 and 120+ seconds to develop depending on how cold the studio was, which felt like 10 minutes if we were in a hurry. Then we peeled and had to avoid getting the caustic, sticky Polagoop on us, our clothes, or the client. After peeling, we could examine the smelly little ‘Roid print and determine how to change the exposure, or move the lights, or add fill, or gels, or cowbell, etc. Polaroid Type 59 color 4×5 produced a murky-colored instant print, nevertheless I joked to clients, “Oh the film will look so much better than the ‘Roid,” while nervously praying it would look half as good. We didn’t have tiny digital TVs on the back of our cameras to chimp at, we had slimy 4×5 inch prints to chimp at, except that the verb “chimp” hadn’t been invented yet.
While other studios were leveraging the speed of strobes to shoot kinetic models with hand-held cameras, every photo in my studio was taken from atop a tripod. I calibrated my ‘Roid-to-film technique by testing and calibrating my favorite films – Ektachrome Pro Plus and Fuji Provia – to deliver perfectly processed film, so my clients would hire me again (and pay me eventually).
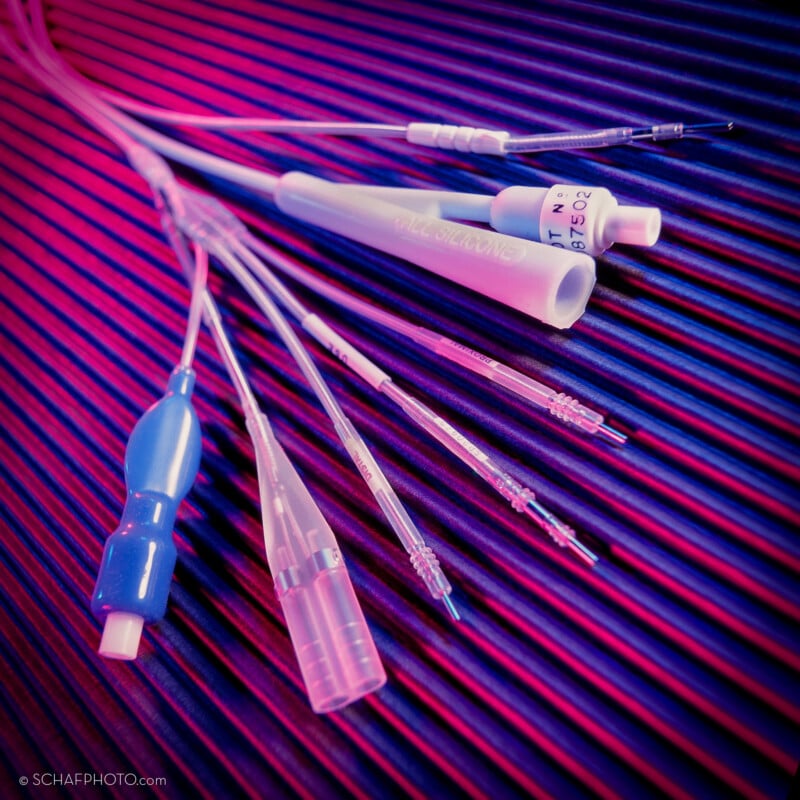
 1996 Studio Logbook for on-location brochure photos for Nusil.
After a few years in my petit upstairs studio with the gnarly stairs, I moved to a larger ground floor studio. I traded in my 4×5 Linhof at Del’s Camera for a Hasselblad and started using medium format transparency film in 120 size. Roll film was easier to load, didn’t have dust, and allowed for easy bracketing and snips. I used pack-film sized black and white Polaroid Type 664, which was relatively sharp, developed faster, and was less smelly than the dreary color Type 669. The biggest bummer was those big 4×5 inch instant prints became tiny 2 ¼ inch squares centered on a smaller 3×4 inch print. On the plus side, E-6 labs like Hallas were omnipresent and busy. If I dropped my E-6 film rolls through the night-drop slot at my pro-lab after work, they’d be processed before dawn the next morning, it was like having Santa’s elves doing half the work. Granted, the approach was expensive, but my day-rate was plus-expenses, so the film was marked up 100% and billed to the client at
$35 per roll and $2 per ‘Roid.
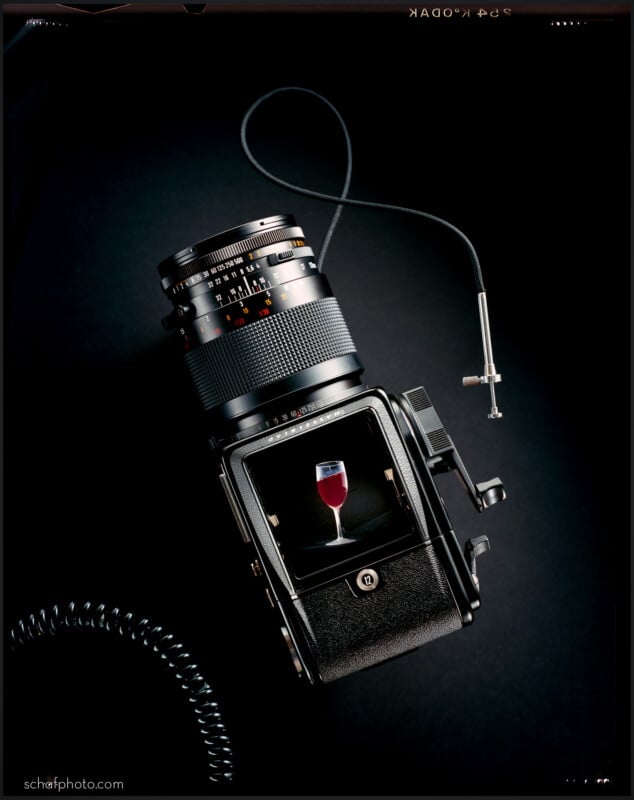
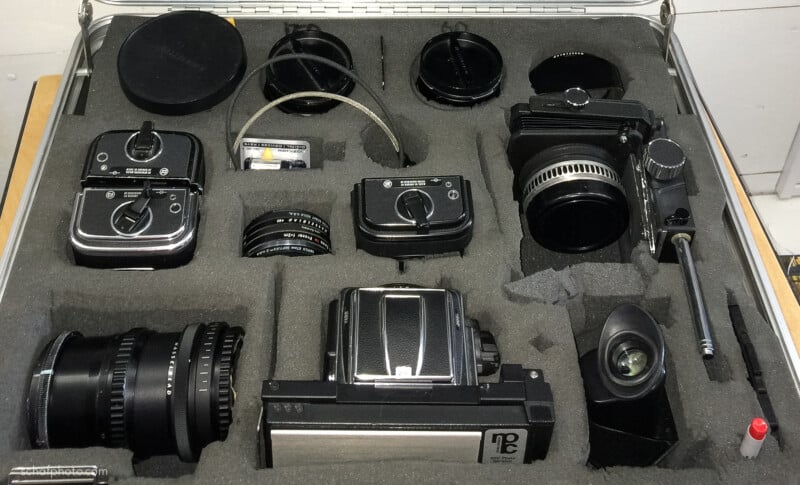 My Hasselblad 201 kit, with NPC Polaroid back pre-attached.
Thirty years ago, before I acquired digital cameras and Photoshop, my workflow looked like this:
- Make coffee
- Put Hasselblad on tripod (usually with 120mm macro lens)
- Place product (or meat-puppet) on set
- Add strobes, flags, reflectors, gobos, etc.
- Add CC or color enhancement gels to lens/lights
- Turn off room lights
- Guesstimate exposure and expose first ‘Roid
- Yank ‘Roid out of Polaroid back and wait too many seconds, Ugh!
- Peel ‘Roid (print) away from goopy negative
- Chimp ‘Roid
- Adjust lights X times and shoot X ‘Roids until satisfied (Where X is a number between 5 and 50)
- Swap Polaroid back and 120 film back and expose film
With a PERFECTLY exposed ‘Roid in hand, I would have the client sign it with a Sharpie, then for my perfect exposure recipe, I’d open the aperture of the lens +1/2 stop, often doing half-stop brackets for insurance. I’d typically have the lab push the film +1/2 stop because I liked the way it brightened the highlights of EPP.
To be extra sure, I might expose four frames (at +1/2) at the beginning of the roll and order a five-inch ‘snip-test’. At the lab, in the darkroom, Jeff the processing tech would take a pair of scissors, cut the first five inches from my 120 roll, and run it through the E-6 processor. I would rock up at the lab two hours later and check the short sliver of film that had about two exposed frames. After visually inspecting the snip, I’d process the remainder by pushing to lighten, or pulling to darken, or just running it the same as the snip. Sometimes snipped frame #1 was perfect and I’d drive it over to my client in my VW van. Note the frame of transparency film needed to be perfect when delivered to the client because there was no editing, no scanning, no retouching, no layers, no Photoshop or Lightroom, no post whatsoever on my part.

My clients — advertising agencies and design firms — would take my film to their favorite service bureau, have it drum-scanned at the required size, and have the image burned on a CD-ROM or Zip-, Syquest-, Jazz-, or Bernoulli-drive as a CMYK prepress-ready Tiff file. If the scanned digital image needed dust-cloning or something like a telephone-pole removed, it would be done on a Scitex prepress workstation by a trained operator at $300 per hour. The client handled any postproduction needed before putting the digital CMYK file in their graphics program de jour (usually Quark Express.) In theory, I was supposed to get the original transparency back but that rarely happened.
Everyone Gets a ‘Roid!
That’s my recollection of working the film mines at peak film in the late 1990s. I hadn’t bothered to look in the rear-view mirror until I was flipping through old logbooks with ‘Roids Scotch-taped to the pages and scribbled notes listing which clients paid late and what they liked for lunch (when folks were still gluten tolerant).
In hindsight, it may appear like peak film just disappeared like the pop of a strobe, but for many togs like me, the switch from my ingrained film mojo to shiny new pixel-making machines was actually a years-long, protracted, expensive, and uncomfortable transition.
I had to supplant my high-quality analog process with half-baked, early- 2000s digital technology — starting with mediocre 4-Megapixel sensors (then 5-, 6-, 10-, lather, rinse, repeat); it was equivalent to an old dog learning new tricks with new fleas.
 9-1996 Client Ventura Printing
When digital first hit the scene with miniscule 1-inch TVs on cameras, they were so small and grainy that I didn’t initially comprehend their value. The term “chimping” was coined as people took pictures and immediately ogled the screens on the back of their digicams. As a recovering ‘Roidaholic I recognize the addiction. In the 20th century, only professional togs got to see their creations instantly through the technology of Polaroid. Amateurs previously had to wait weeks, days, or at least an hour. When the public got hold of ‘Roid-like chimping tech on everyday cameras, they couldn’t avert their eyes. Just like back in the day, it’s the difference between hoping we got the shot and knowing we got the shot.
As digital flourished, antique boomer ‘togs like me bemoaned the death of film. Peel-apart Polaroid disappeared, labs closed, photo magazines folded, and camera manufacturers pivoted to pixels. By 2010, film demand had fallen off a cliff like Wyle E. Coyote… Boo.
But to my surprise, film bounced back. Dexter’s Camera is still selling rolls of Kodacolor Gold — just like when I worked there 36 years ago. Fujifilm’s INSTAX made instant photography wildly popular again. Upstart print labs are flourishing, schools are reviving darkroom classes, Harman, CineStill, and others are releasing fresh film stocks, and new companies like Intrepid and Negative Supply are leveraging the analog rebound. After 30 years in business, I still make my living exposing light sensitive stuff. I’m very lucky that half of my work is pixels and half is still film, and they both have a place in my studio and in my heart.
If it wasn’t for hipsters, film would be deader than my old fax machine… So, thank a hipster, shoot more film, and chimp on, fellow togs, chimp on!
About the author: Stephen Schafer (AKA: Schaf) documents the historic buildings, structures, and landscapes of our inherited environment. His client list reflects a long career, encompassing institutions, corporations, and cities as diverse as San Francisco, Los Angeles, Riverside, Alameda, Santa Monica, San Jose, and Berkeley, as well as the Ports of Long Beach and Los Angeles. He started teaching photography in 1997 in the University of Pittsburgh’s Semester at Sea program aboard an ocean liner circumnavigating the globe, then at the LA Center of Photography and Cal State Northridge, and now at the University of Southern California School of Architecture. This story was also published on Schaf’s substack.


 English (US) ·